Monday, March 26, 2012

I am still anxiously awaiting news about the Georgia Cottage Food Law.  The last I heard was that there should be some sort of decision made in April.  I can tell you this, waiting for things is not my area of expertise!  On a similar note, my kickstarter project seems to be in a lull.  I am so very thankful to those that have donated to my project and are continuing to share my page.  However, with only 19 days left, and being so far from my goal, I will have to come up with a backup plan just in case.  I know so many that are waiting until the end to see what happens and then make a contribution.  Please don't wait too late!!!

I had a great weekend.  Saturday morning my Nicholas scored his first goal in soccer!!!!  I am VERY proud of him and all of his hard work.  Then, hubby and I delivered a wedding cake.  Now, I have to admit that I am not nearly as versed in buttercream cakes.  I prefer using fondant to cover a cake and feel that it's just a better medium for me.  But, once the flowers were added to the cake, it looked beautiful, and perfect for the chic rustic elegance at Tucker Plantation.


We had a great dinner with my parents Saturday evening!  And spent some time outside enjoying the beautiful weather with the neighbors yesterday.

This week is filled with cleaning, packing and making cakes for my niece and nephew.  Then, 7 hour drive WITH the cakes for their parties this weekend.  Sounds fun right?  Now to get my head wrapped around a concept for the cakes!

Happy Monday!

Tuesday, March 20, 2012

Happy Spring!!!

It is the first day of Spring, and the pollen count is already at record highs.  Today's count...9369!!!!  We have completely skipped over that time of year when you can have the windows open and get a nice breeze blowing through.  I mean, it practically feels like summertime outside!  I almost got a sunburn sitting outside with the neighbors on Sunday...in March...really?!?!? 

As of today, my kickstarter project is 8% funded.  There are only 25 days left to donate, so please continue to share the word!!!

 http://www.kickstarter.com/projects/1920130639/hobby-baker-wants-to-go-pro

This was a pretty eventful weekend.  Friday night was the St.Patty's day party with the neighbors.  SOOO much yummy food!  I made these fun treats for the adults. 
Chocolate Guinness cake layered with a Guinness reduction and Bailey's Irish Cream Buttercream and topped with a white chocolate shamrock.


I also had two friends that asked if I could make cakes for their girls this weekend.  I LOVE the way this one turned out!  The only request was that her daughter could easily recognize it as Tangled.  The most tedious task of the cake was making all of the shingles. 


I had some challenges with this one.  One of my BFFs asks that I make cakes for her kids every year.  She sent me a pic of the paper products they were using and asked if I could use that as an inspiration.  BUT...she didn't want fondant on the cake.  I don't do buttercream covered cakes as well as I do fondant ones.  Fondant is just my "thing" I suppose.  Traditional bakers, well... I give them props because it just doesn't come as naturally to me.  And my piping skills are not fantastic, although I don't spend a lot of time practicing.  You can see that most of my cakes have a simple bead border around the bottom just to give a finish on the cake. 

This was my inspiration...


And this is the cake. 


The colors were a little more vibrant in person.  I will be the first to admit that I am not the best photographer.  I airbrushed the cake using the different colors from the plates and the black center.  The stars are the ONLY fondant pieces on the cake.  The peace signs are white chocolate.  Oh, and there is black edible glitter on the cake too!

The weather outside lately has been absolutely beautiful, but on the verge of being HOT.  It was so warm on Sunday, that the hubby pulled out the slip-n-slide and sprinklers for the boys to play in.  Which meant that all of the neighbors came to play too.  It was so funny watching the kids splash through the water.


Happy Spring Everyone!


Thursday, March 15, 2012

Welcome the newest member of my family!!!


I am sooo excited to share with you the newest member of my family!  After the shocking (literally) retirement of old yellar, I convinced the hubby that I needed a second, bigger mixer.  It actually didn't take much convincing at all.  Well, she arrived yesterday, and boy is she FANCY!  Just look at her brushed nickle die cast exterior.  And that mixing bowl... 7 qts!  This is a workhorse of a machine and I can't wait to break her in.


I have to admit that I feel  like I'm cheating on my KitchenAid though.  I looked into another KA, a larger one...but the fact is, that they just didn't compare to the 1000 watts of power, the warranty, the size, and the reviews of this one.  Oh, and I got a FANTASTIC deal on it that I just couldn't pass up.  And, I'm not sure if you've noticed, but this is the same mixer that they use on Cupcake Wars!


Here is an updated kickstarter report in case you haven't checked lately...

I currently have 17 backers (YAY!!!!) and am almost to 8% funded.  With only 30 days left, I still have a LONG way to go.  I know so many people are probably getting tired of seeing my posts on facebook, but I know several people that will put it off until the end and forget about it unless reminded.  You know who you are.  ;) 

Please take a moment to watch the video, read my story, check out the sweet rewards I am offering, and make a donation.  And, if you could pass the site along to friends and family, that would make it even better! 

http://www.kickstarter.com/projects/1920130639/hobby-baker-wants-to-go-pro

I hope you have a beautiful day!

Wednesday, March 14, 2012

Medieval Shield and Gettin' Crafty

Happy Pi Day!!!  3.14

I forgot to share the the cake I made over the weekend.  A friend of mine was taking her son to see Medieval Times for his birthday and wanted a cake to look like a Medieval Shield.  She sent a picture of one she found on the computer that was great, but didn't look very realistic.  Thankfully, she let me have some artistic freedom, and I came up with something a little more intricate.  Here you go!

And yes, it is all completely edible.  All of the pieces are carved/sculpted by hand.  It took a little while to get the color right, but I'm really pleased with the way it turned out! 

So, I was feeling pretty crafty yesterday.  It happens on occasion.  Mostly with cakes, but when I've got a burr in my saddle who knows what will happen.  I have to tell you that I am completely addicted to pinterest.  If you haven't joined pinterest yet, beware!  If you have, then you know exactly what I'm talking about!!!

I've seen so many of these yarn balls all over the internet, and everyone seems to have a different method of creating them.  I read so many good reviews about a particular method and then so many bad ones, so I decided to give it a go, and see what happens.  I based my method off keytoflow.  She uses a paper mache base for making her yarn balls.  I've also seen them made with an Elmer's Craft Glue/water mixture and some made with liquid fabric starch.  They didn't quite seem as successful to me.  I made my yarn balls for spring decorations, but had originally "pinned" it to use in the fall, and then I think I "pinned" it again at Christmas.  You can see how much I procrastinated.
You'll need various colors of yarn, balloons, wax paper, flour & sugar.

In a medium sized pot, bring 1C water to a boil.

In a separate bowl, mix 1C cold water with 1/4 C flour.

Add flour mixture to boiling water, stirring until smooth.  Bring back to boil.
Remove from heat and add 1 1/2T sugar.  Allow mixture to cool.
Here's where it gets tricky!  I tried several methods here and the best seemed to be piling a really long section of yarn in the pot covering yarn completely, then pulling yarn through my fingers to get excess mix off and loosely piling on wax covered counter.  I don't have a picture of this method because you can imagine what my fingers looked like at the time.
Once yarn is coated with paper mache mixture, begin wrapping it around the balloon.  I don't think there's a right or wrong way to do this.  For me, I wanted my balloons to be pretty covered, so it took a good bit of yarn.  Make sure to tuck ends in.
Now, there are several different things you can do at this point.  Most methods have you sit the covered balloon on a wax covered cookie sheet and let sit for a day or two.  Some hung the balloons up overnight to dry, making sure there was paper underneath to catch any drippage.  I am not nearly patient enough for either of those ideas....ESPECIALLY if my method failed and I had wasted time and yarn that I bought just for this.  SO, I turned my oven on the lowest setting.  For me, it was 170 degrees.  I placed covered balloons on a wax covered cookie sheet in the oven with the door cracked open.  I was hesitant about shutting the door all the way in case the balloon decided to burst.  You will hear a little crackling and see the balloons expanding a bit.  I let them sit in the oven for about 20 minutes and then went back to check.  They were already getting hard, but areas with a lot of paper mache took longer.  I rotated the balloons a few times and tried to make sure they were as dry as possible.  Once firm, I pulled them from the oven and you could almost immediately see the balloon shrinking a bit from the temp change.  I used my finger to push the balloon away from the yarn. 
Now, gently pop the balloon and cut it away from the yarn ball.  A few of mine were still a little damp, so I put them back in the oven at this point without the balloon.  They held shape well. 


Here is my finished product.  I wish I had made a few more to fill it out better.  This was a VERY inexpensive project, costing me just some yarn since I had everything else.  They would look beautiful on a table, in apothecary jars, or a vase.  You can play with different sized balloons, maybe add some glitter, and create different ones for each season!

Happy Crafting!!

Tuesday, March 6, 2012

The BRACE

I get asked all the time if I went to culinary school to learn how to decorate cakes.  Truth of the matter is no.  I was actually a music major, played in various advanced orchestras and symphonies throughout high school and college, attended one of the best music camps in the east, and took lessons from an amazing teacher.  It was a LOT of work, required way more practice than I ever wanted to put into it, and realized that it was just not the path I wanted to stay on forever.  Somewhere down the road, like many musicians, I began having problems with my wrists, I wore special gloves when I practiced, and used some heat therapy for relief.  When I ended my musical career, the pain became obsolete.  Over the course of the past few months, it has returned, back in full force.  Some days are certainly better than others, but when I have days of rolling fondant and doing a lot of piping, I clench my teeth and push through the pain.  Perhaps not the best idea, but mind over matter has to work at times, right?

One day I'm sure I will have to go see an orthopedic, but for now my wonderful mom found some awesome braces for me to wear.  I have one that I can wear during the daytime while I'm working on the computer around the house, etc.  I don't wear it all the time, but it is really comfortable.  It offers pretty free range of movement on my fingers and has a flexible splint for support.  And, this is my nighttime brace...

As you can see, not a whole lot of movement there.  It stabilizes my wrist more.  It was a bit challenging to get used to.  The first night was fine.  The next several nights I woke up to find it lying half way across my room.  I'm guessing I probably pulled it off and threw it!  Anyway, today I will be spending a bit of time in the big one in hopes that I might get some relief from last week. 


So, what was so crazy about last week???  It just so happened that several friends had asked me to make cakes for them, and crazy me, said yes to all of them!  I ended up making cakes for a baby shower,

a birthday,

and yes, a wedding!  I was so honored to make this cake for Matt & Traci.  It looks pretty awesome on that piano, right?!? 

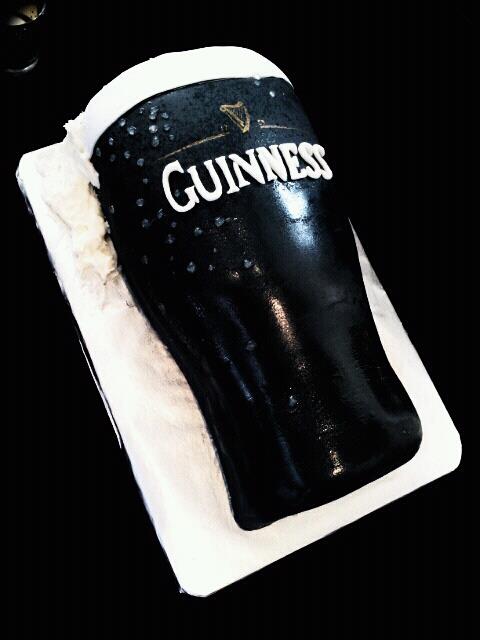
Here's is Matt's Reese's Peanut Butter Cup groom's cake.  I'm pretty happy with how the sweat beads turned out. 

We were unable to make it to the actual ceremony because, well, the loading zone was blocked by other trucks, as were the the walkways to get the cake in the building.  Even though we had a cart to put the cake tiers on, my hubby had to carry each of them at an odd angle, with tree branches practically in his face.  Not an easy task.  Oh, and did I mention that there were these crazy kids like running all through the cars in the parking lot?  It was so frustrating.  Reception was great, food was yummy, and everyone enjoyed the cake.  There were several people that went back for second and third pieces!!! 

Congrats to Matt & Traci!!!

I didn't get any good pics of them cutting the cake, but this was during the best man toast.


And, just so you know, my kickstarter project is at $680 as of last night!!!  I still have a long way to go, so please keep sharing the info with friends and family. 

http://www.kickstarter.com/projects/1920130639/hobby-baker-wants-to-go-pro